
Having long hair has been a dream of mine since I was a child. It might seem silly but personally I love the look of it. It reminds me of an aunt who used to visit us when I was little, an older woman with long, beautiful hair. I remember being in awe of her. Unachieved goals sometimes drag into adulthood and until you achieve them they will always be a thought in the back of your mind. And I’m all about achieving my goals… even the silliest of them.
My hair has been sitting just past waist length for a couple of years now, always almost there, never quite making it. Every time I’d get close, my ends would start breaking and I’d have to trim. Back to waist length and back to square one. Although I am grateful for overcoming my bra-strap length plateau before that, and the shoulder length plateau before that (I wrote about the full journey here: My 10+ Year Hair Growth Journey), waist length was starting to feel like a ceiling.
It took me a while to connect the dots. I thought my hair just wasn’t growing and maybe I had reached terminal length. Then I watched a video that explained something I hadn’t considered: the little hairs I kept finding on my sink weren’t shed hair. They were breakage.
I’d heard about finger detangling before but honestly, I’d always dismissed it. There was no way I had the patience for that. And then I had a baby, and suddenly I had a completely different relationship with patience. So on February 21st I put my Tangle Teezer and my detangling paddle brush to the side and decided to use nothing but my fingers for 30 days.
This post is everything I learned: the method, the real mistakes I made, the products that helped, and one mindset shift I really didn’t expect. My personal 30-day results are at the bottom (Check back on March 27 when my full YouTube demonstration goes live!).
What is finger detangling and why does it work?
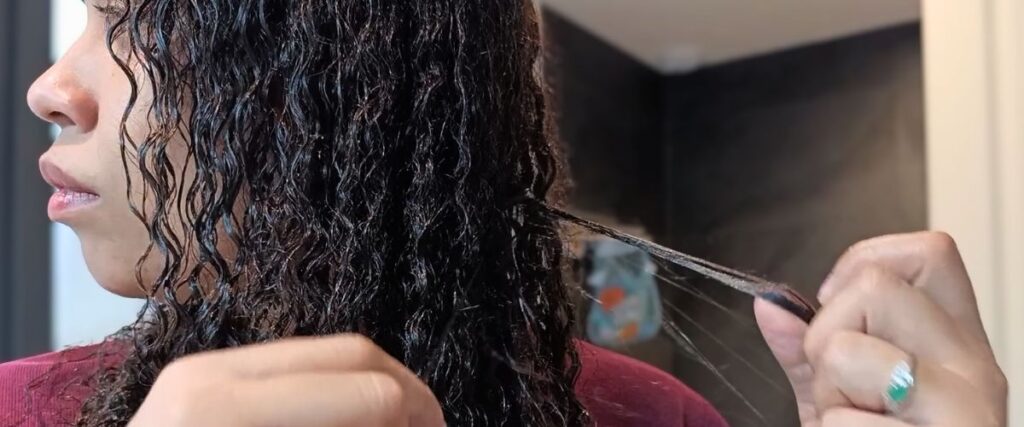
Finger detangling is exactly what it sounds like: using only your fingers to work through knots and shed hair instead of a brush or comb.
The reason it reduces breakage is simple. Your fingers can feel resistance in a way that tools cannot. When you hit a knot with a brush you push through it. When you hit a knot with your fingers you naturally slow down, separate the hair gently, and work around it.
If you have 3B/3C curls like I do, you know our specific pattern is a magnet for knots and tangles. Every time you force a tool through them, you aren’t just detangling, you’re causing unnecessary breakage. If you aren’t seeing growth, it often means your hair is breaking off faster than it can retain length.
For postpartum hair it matters even more. Hair that’s already weakened from hormonal shedding cannot handle aggressive detangling. Low manipulation isn’t a trend. It’s damage prevention.
How to finger detangle (the method that actually works)
Wet or dry?
This is the most common question and the honest answer is: you will probably do both, depending on where you are in your routine. On wash day you detangle wet, there’s no way around it. Your hair is freshly washed and soaking, and that’s when you need to work through the knots before styling. But here’s what I noticed: wet finger detangling feels like it never ends. The more you work through a section, the more the hair seems to tangle back on itself. With a brush you get that smooth, clean finish relatively quickly. With fingers on wet hair… you never quite get there.
What helped me was accepting that. Wet finger detangling will not feel as satisfying as brushing. That’s not a problem, it’s just the nature of the method. The goal is gentle separation, not perfect smoothness.
Between wash days, dry detangling is a different story. On dry hair your fingers have more control, the hair has more structure, and the process is quicker and less frustrating. If you want to refresh or re-braid between wash days, do it on dry hair with some leave in conditioner. You can use a spray bottle with water for some extra slip.
Some people recommend washing in sections and detangling each section before moving on. I wash my whole head at once and it works for me, though it does take longer. If you have very thick or dense hair it might be worth trying the sectioning method to see if it speeds things up for you.
The ends-first rule, and why it feels counterintuitive
Everything about finger detangling says start at the ends and work up to the roots. When I’m brushing I already do this naturally. But with finger detangling it felt completely unnatural. My instinct was to separate sections from the root and work down. And when I tried the ends-first approach, by the time I reached my roots my ends were tangled again from all the separation.
This is where I had to let go of perfectionism. Your hair will not be perfectly detangled. That is fine. Do what you can gently, braid it up, and trust that the next session will be smoother. Mine was.
Step by step:
- Divide your hair into sections. I work with two large sections, one each side, which suits my two French braid protective style.
- Start from the ends, then mid-length, then roots.
- Use your fingers to gently separate shed hair from the section. You’re looking for single strands that have already shed but are caught in the curl.
- Work slowly. Detangling is the goal, but your hair doesn’t have to be perfectly detangled.
The product tip that changed everything:
Before you start detangling, lightly mist your hair with a diluted aloe vera spray. Mix ⅓ aloe vera gel with ⅔ water in a spray bottle and shake well. This gives your fingers slip without weighing the hair down, and it’s what prevents the snapping feeling you get on dry hair. If you have aloe vera juice that works even better, it absorbs faster. But gel diluted with water works perfectly well.
The protective style that made finger detangling possible
I finger detangle and then braid my hair into two French braids. This is my protective style throughout the experiment and it’s what keeps my ends tucked and protected between wash days. A few things I learned about the braid protective style that directly affect your results:
Rebraid less than you think you need to.µ
I was rebraiding every 1-2 days because my hair felt dry. But every rebraid is manipulation, and manipulation is exactly what we’re trying to reduce. Every time you take the braids down and redo them you risk breakage at the points where the hair was bent. The goal is to stretch rebraiding to every 3-4 days by keeping moisture topped up while the braids are still in.
How to refresh between rebraids (days 2 and 3):
Don’t take the braids down. Instead:
- Lightly mist your diluted aloe vera spray along the length of each braid
- Focus on the scalp and the ends
- Seal the ends with a small amount of castor oil
Your hair isn’t dry. It’s just thirsty. Give it a drink without fully manipulating it. This should buy you another day or two before it actually needs to come down.
On rebraid day (every 3-4 days):
This is your full reset. Take the braids down slowly, apply your aloe spray before you detangle, then go through your full routine: leave-in on the length, curl cream distributed through, oils to seal, and rebraid. LOC or LCO as you feel comfortable. Sometimes I just do leave in and jojoba oil.
What the braid-out showed me:µ
Something I didn’t expect from this experiment was discovering the braid-out as a styling result in itself.
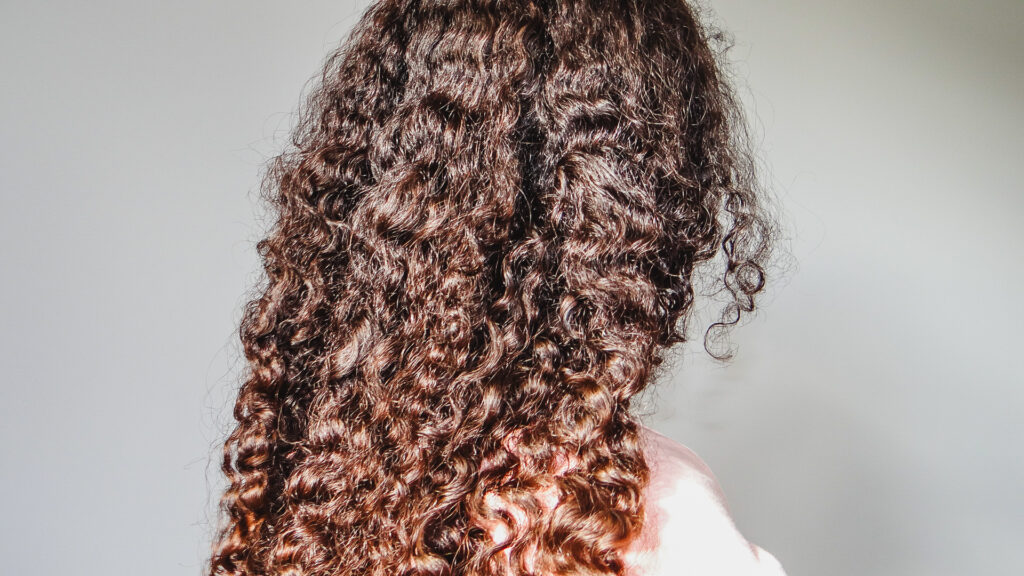
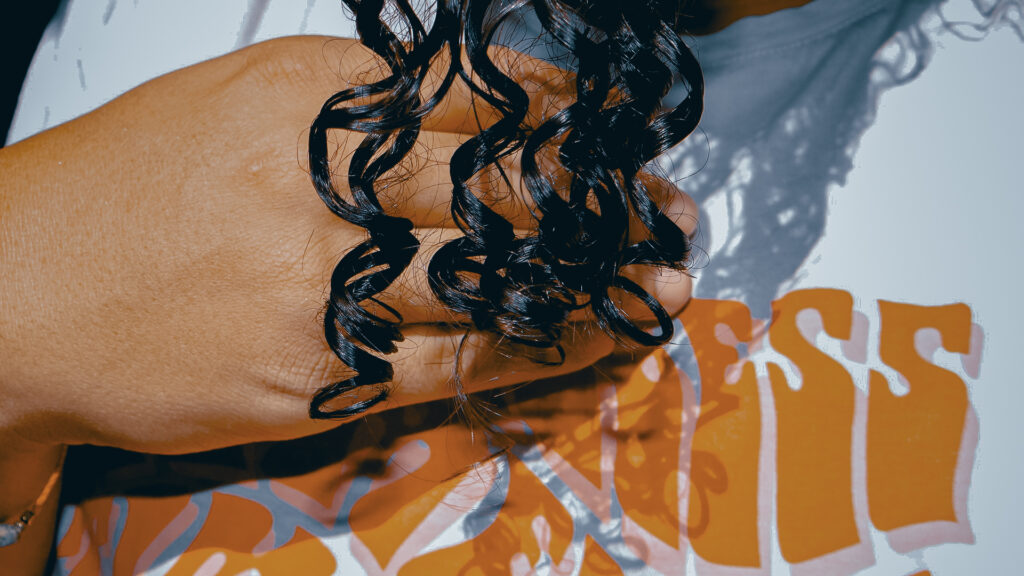
When I took down my French braids after a few days, my hair had this beautiful wave pattern, almost like a heatless pin curl set but with a slightly tighter curl. Defined, elongated, with real body. I hadn’t really paid attention to what braiding my hair overnight or for a few days could do to the texture. It’s become my favourite way to stretch my curls without any heat.
Around Day 15 I also noticed something while washing: my wet hair was almost touching my tailbone. Almost. That was the first real visual sign that my length was there, even if you can’t see it when my curls are fully defined and spring up.
I did trim again around this point. I know. Scissor-happy. I’ve stopped. I promise.
But the braid-out taught me something useful: you don’t need heat to stretch 3B/3C curls. A simple two-braid protective style worn for a few days gives you elongation, wave definition, and length visibility without any damage. That’s a win I’ll keep using long after this experiment is over.
Products I used during the 30 days
I kept my product routine deliberately simple during this experiment. The whole point of low manipulation is less: less handling, less product, less interference.
What I used:
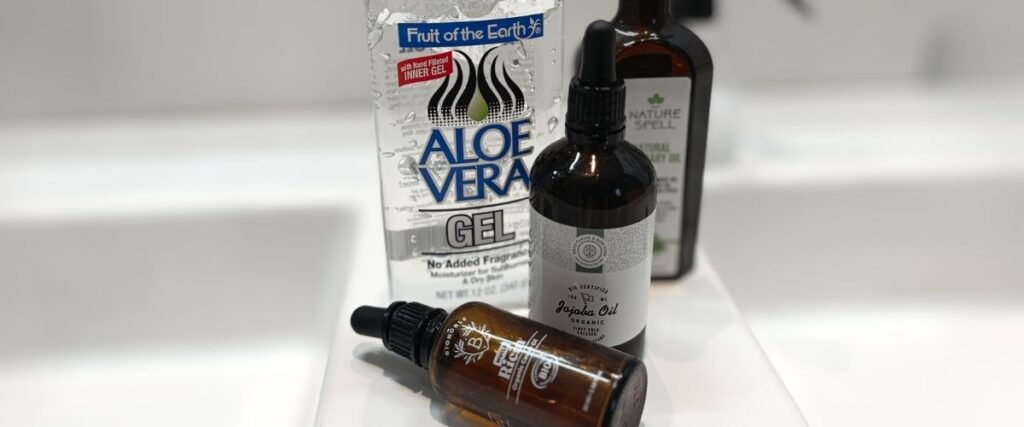
- Aloe vera gel diluted with water: my detangling spray before every session. Mix ⅓ gel with ⅔ water in a spray bottle and shake before each use. Aloe vera juice works even better if you have it.
- Leave-in conditioner: applied after detangling, focused on mid-length and ends. Don’t overload the roots. I used different leave in conditioners.
- Curl cream: a small amount distributed through to define the curl pattern before braiding. I use just enough to see it working, not enough to feel it.
- Jojoba oil: this one deserves a proper mention because it’s been part of my routine for years and I think it’s genuinely underrated for 3B/3C hair. It’s incredibly lightweight, doesn’t sit on top of the hair, and mimics the scalp’s natural sebum which means it absorbs without buildup. I use it on my mid-lengths and ends after leave-in. → [Cliganic Organic Jojoba Oil]
(While I originally used a different brand, I’ve found Cliganic Organic Jojoba Oil to be just as high-quality and trustworthy for 3B/3C curls.)
- Castor oil: seals the ends after styling and works well for end refreshes between rebraids. I also mix a little castor oil with jojoba when my ends feel particularly dry. The jojoba lightens the castor oil so it doesn’t feel heavy or sticky.
- Nature Spell Rosemary Oil: applied to my scalp on wash days and sometimes on dry hair between washes. Postpartum hair loss is real and I wanted to support my scalp throughout the experiment. → [Nature Spell Rosemary Oil]
One important note: I didn’t add anything new mid-experiment. If you’re trying this method, resist the urge to introduce new products halfway through. You want to isolate the variable, the detangling method, not muddy the results with five new things at once.
Tips specifically for postpartum hair
If you’re postpartum and reading this because your hair is shedding and you’re scared to detangle, this section is for you.
Postpartum shedding typically peaks around 3-4 months after birth and can last until month 6 or beyond. It is hormonal, it is temporary, and it is not the same as permanent hair loss. But it does mean your hair is weaker than usual and needs gentler handling.
Something I want to say about the timing of this experiment: finger detangling postpartum might actually be easier than you think, not harder.
In that first year with a baby I found myself searching for things to do with my hands while my son was doing floor time and tummy time. Moments when I wanted to be present and keep my hands busy. For his first year we did zero screentime so I used to work out or braid my hair alot. Now, in my second year I find finger detangling unexpectedly therapeutic: hands busy, mind quiet, toddler nearby. It became something I did for myself without it feeling like a task.
If that sounds like your life right now, it’s worth trying.
A few specific adaptations for postpartum hair:
- Detangle less frequently: every 3-4 days is enough. Daily detangling removes shed hair that your scalp hasn’t fully released yet.
- Focus on scalp health: rosemary oil has been studied for its effect on scalp circulation and is one of the gentler options for postpartum use. → [Nature Spell Rosemary Oil]
- Sleep on satin: postpartum hair breaks against cotton pillowcases faster than healthy hair. This is the single easiest change you can make. → [link to Satin Pillowcase post]
- Accept imperfect detangling: during postpartum shedding there will always be shed hair caught in your curls. You do not need to remove every strand. Gentle and incomplete is better than thorough and rough.

Common finger detangling mistakes to avoid
Starting at the roots The most natural instinct when you finger detangle is to start at the roots because that’s where the hair meets your scalp. For curly hair this is wrong. Starting at the roots drags every knot downward through the entire length of the hair. Always start at the ends, even when it feels counterintuitive.
Going too fast Finger detangling is slower than using a tool. That’s the whole point. If you’re rushing through it you’re not doing it properly, you’re just pulling with your fingers instead of a brush.
Skipping the slip Dry fingers on dry hair without any product creates friction and static. Always use your aloe vera spray or a detangling product before you start. This is non-negotiable.
Rebraiding too often Every rebraid is manipulation. If you’re taking your hair down every day or two because it feels dry, add a refresh routine instead. Mist, seal, leave alone. This is challenging for me personally.
Expecting perfection Your hair will not be perfectly detangled after every session. Some knots will stay. That is fine. The goal is not perfect detangling, it’s less damage over time. This was the hardest thing for me to accept and also the most freeing.
The thing that surprised me most
I’ve always wanted hair I could run my fingers through.
Completely knot-free, fingers gliding from root to tip… that was my idea of healthy hair. And I assumed I’d never get there with 3B/3C curls so I kept forcing it, kept pulling, kept trying to make my hair into something it wasn’t.
What surprised me about this experiment is that I stopped needing that.
30 days of finger detangling taught me to accept my hair as it actually is: curly, tangled at times, imperfect. I can’t run my fingers through it perfectly and that’s okay. It doesn’t mean something is wrong. It means I have curly hair.
I also realised I’d been rough with my hair my whole life because I genuinely thought I had to be. Almost like as if the hairs I brushed out were the weak ones anyway and they needed to go. But that is not true. I was just ripping through my hair. Watching myself in videos, detangling, braiding, I could see how aggressive I was. Something about slowing down for the hair experiment made me slow down in other areas too.
That sounds small. It wasn’t.
What’s next
After 30 days of fingers only I’m moving into Month 2 of my experiment, introducing a wide tooth comb and flaxseed gel alongside finger detangling. Flaxseed gel is interesting because it gives incredible slip for detangling and defines the curl without buildup. I’ll be making my own at home, post and video coming in April, and testing how it changes the whole process.
The 90-day experiment arc:
- Month 1: Finger detangling only (this post)
- Month 2: Finger detangling + wide tooth comb + flaxseed gel (starting late March)
- Month 3: Finger detangling + gradual brush reintroduction + Kitsch Thermal Rollers for heatless stretching
CONCLUSION
Finger detangling is not a miracle method. It won’t grow your hair overnight and it won’t eliminate breakage completely. But it might change your relationship with your hair: the way you handle it, the patience you bring to it, the damage you stop causing without realising. It did for me.
If you’re postpartum, if you’re scared of your brush, if your ends never seem to recover… try this for 30 days. Not perfectly. Just gently.
Your hair doesn’t need force. It needs patience.

Products I used: [Nature Spell Rosemary Oil on Amazon] · [Jojoba Oil on Amazon]
I’m starting with these two absolute staples, but keep an eye on this space — more curated picks are on the way!
Note pour ma communauté en France : Pour l’instant, ce sont des liens Amazon.com, mais je vous prépare une sélection spéciale sur Amazon.fr pour vous faciliter la vie. Les liens arrivent très vite, restez connectées ! 🇫🇷<3
Read next: [Why I Sleep on a Satin Pillowcase] · [Best Oils for Curly Hair Growth] · [My Simple Wash Day Routine]
Really enjoyed this high-quality article. The entire website is consistently useful and well-organized.
Thank you for your feedback, I am ready glad you enjoyed it!
I appreciate you 🙂